Category Archives: Crafts

Four years in the making…

It all started with this picture that came up on my social media feed back in January of 2015:

I LOVED how it looked like a sewn quilt, but was actually crocheted. I did some research and I think the pattern was called Grandmother’s Flower Garden… At that time, I was looking for a project that was portable with the potential to be connected into something bigger. Also, our down comforter seemed to be losing some of its warmth, so the thought of making something functional AND pretty was intriguing.๐Ÿงถ

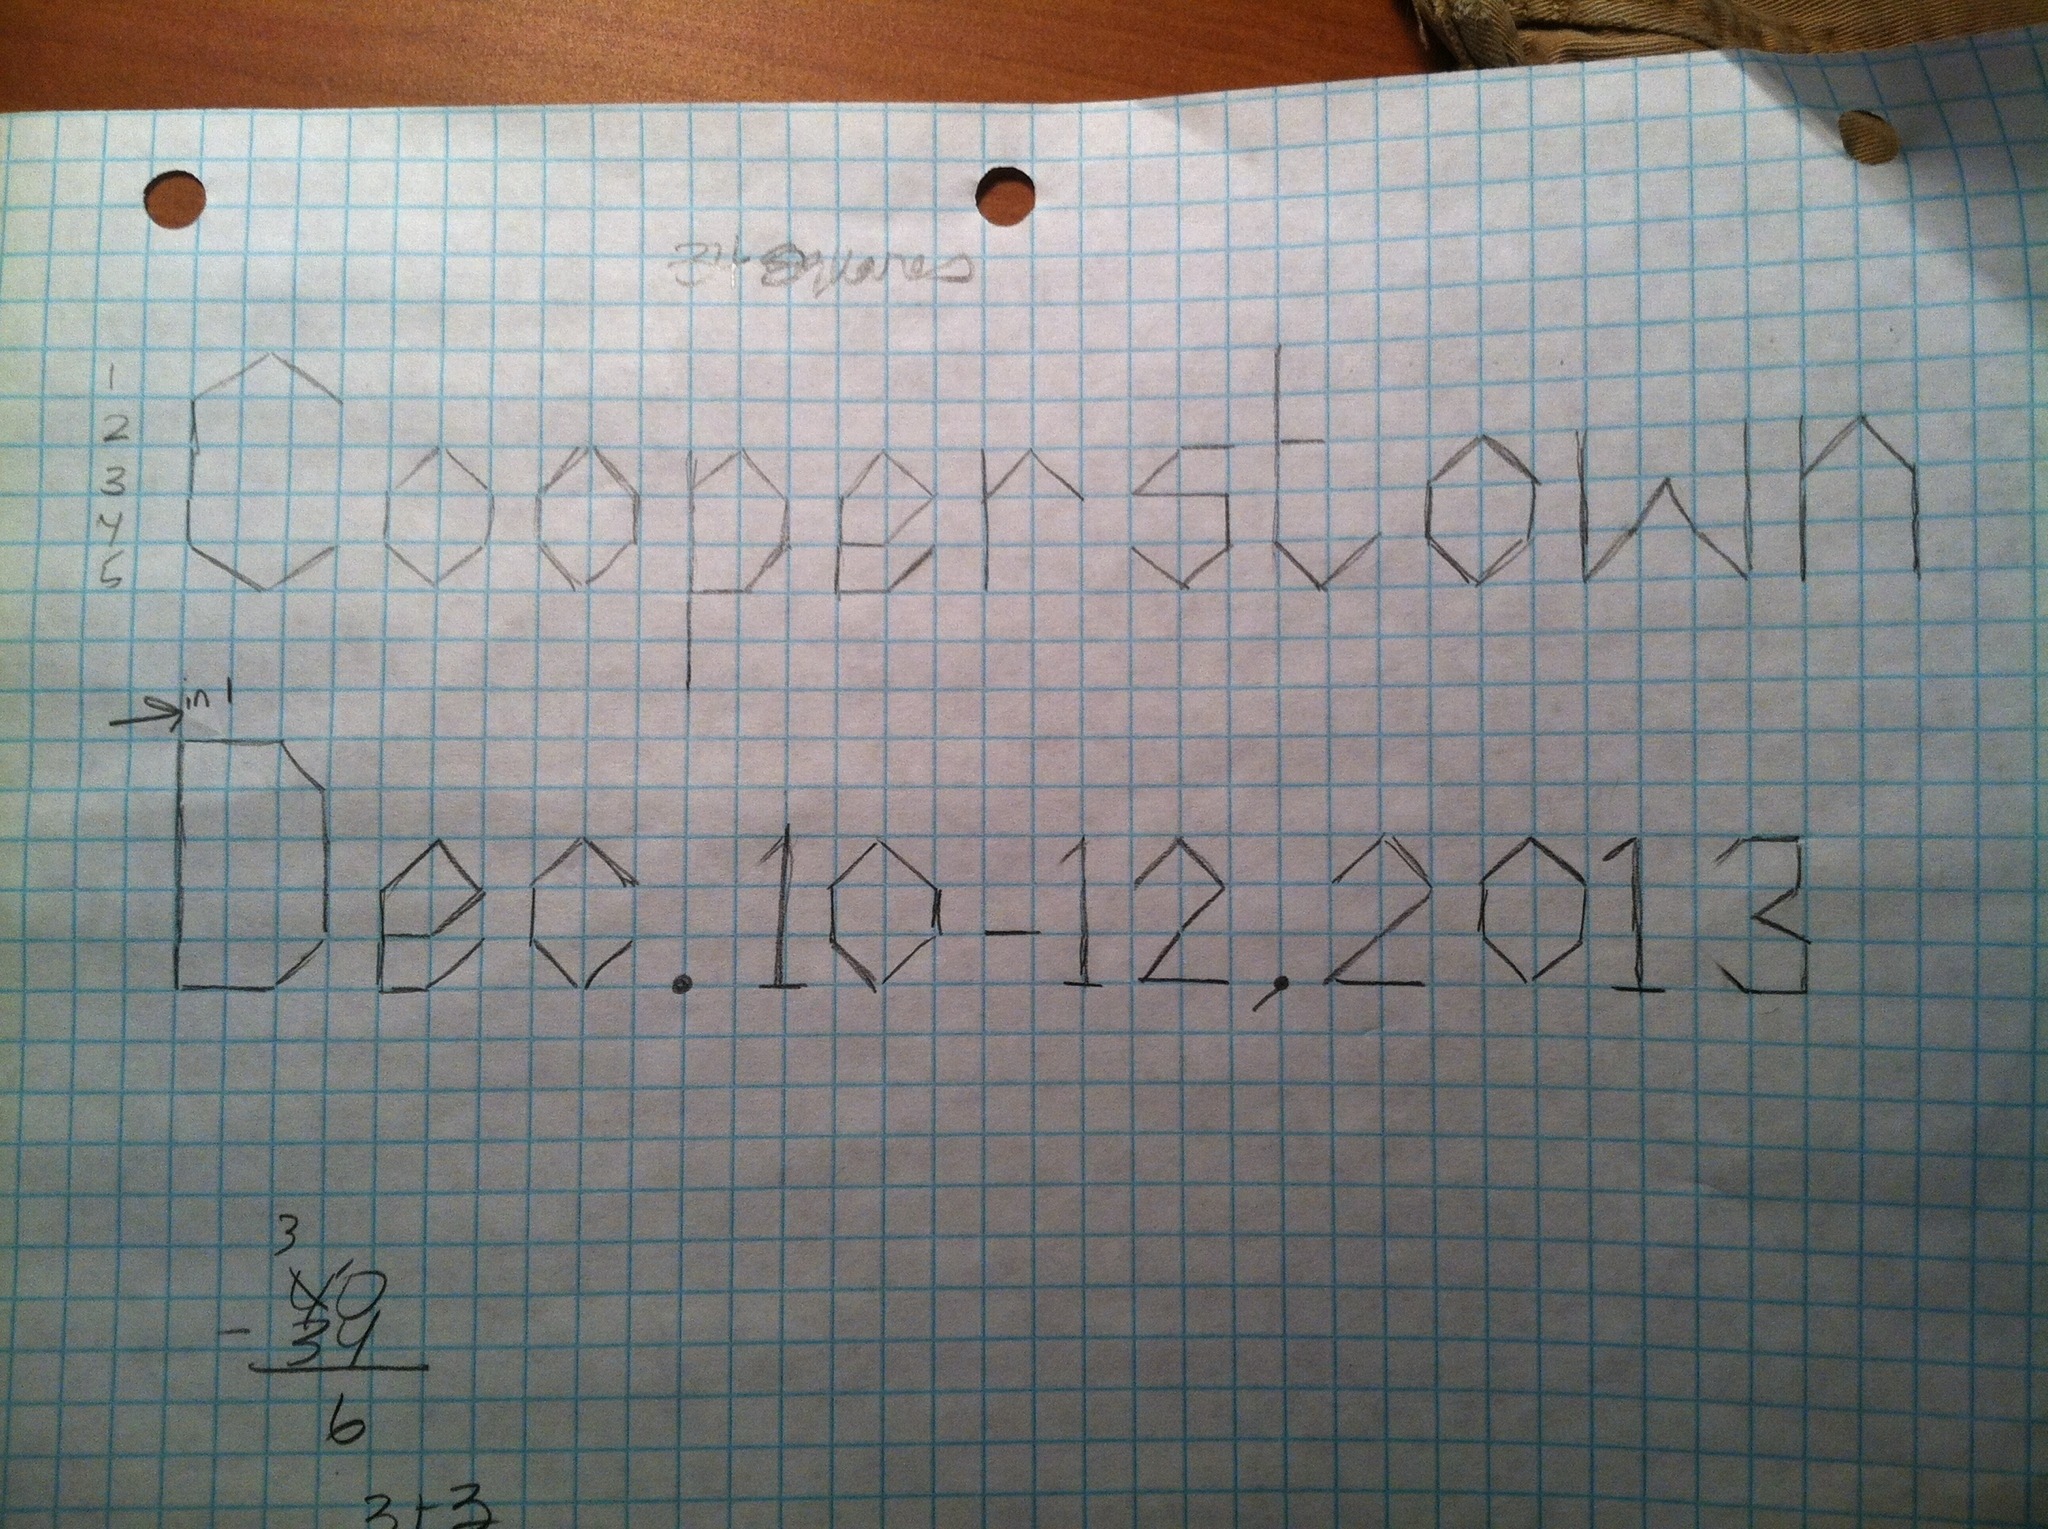
I decided to create my own pattern since I wasn’t finding what I wanted as I searched. We found some hexagon graph paper, and Mike helped me map it out.๐Ÿค“

After researching all about different fibers, we decided to use wool.๐Ÿ‘

And even though I knew the cost to make it would be higher, I really wanted to use yarn from a smaller company. I was excited when I learned about Brown Sheep Yarn, and that a small, local yarn shop had it in stock.๐Ÿงถ

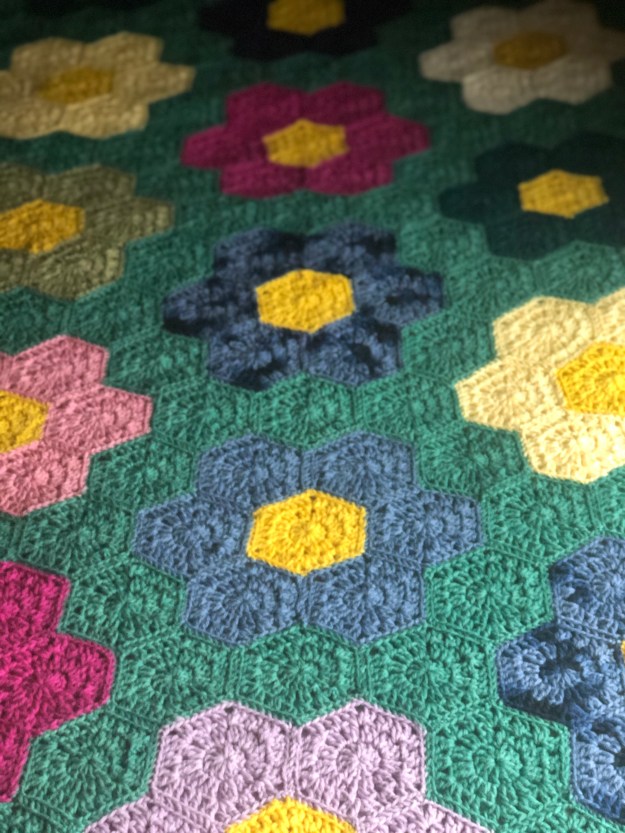
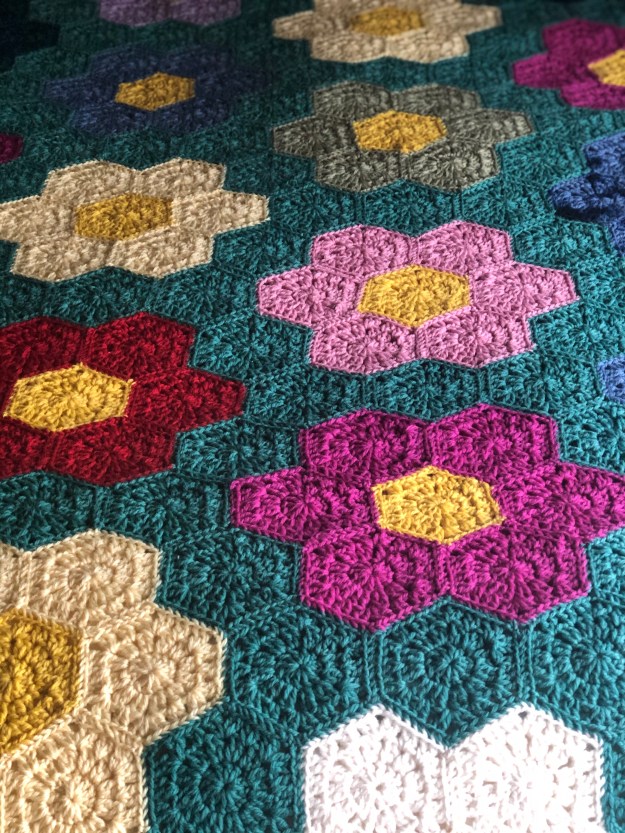
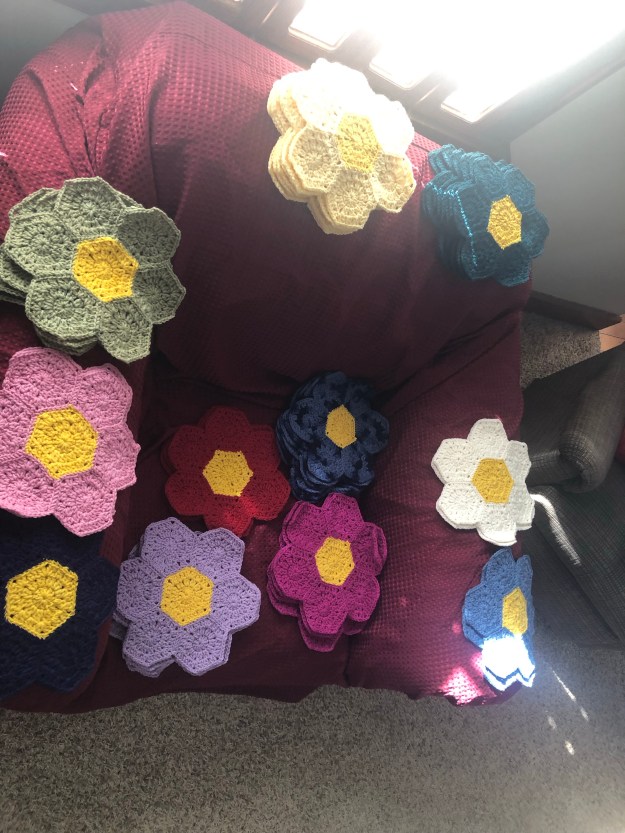
In October of 2015, we started acquiring skeins. (I could crochet 21 hexagons from each skein.) Each one was $8, so we just purchased them for the flower petals as we had the funds. We waited until we had a larger chunk saved up to purchase all the yellow at once. A benefit to this kind of patchwork project is that dye lots are really not that important. Any slight color variations wouldn’t really be noticed. We also did not assign flower colors on our graphed pattern until after I had most of the flowers done. I had no color preferences for the flower petals going into the project, but I wanted the middle of each flower to be the same yellow. I wanted the flowers to be random. (In reality, it is more like planned random, lol.๐Ÿ˜‚) I wanted there to be enough flower colors that when I laid them all out, I wouldn’t have two of the same color next to one another.๐ŸŒธ

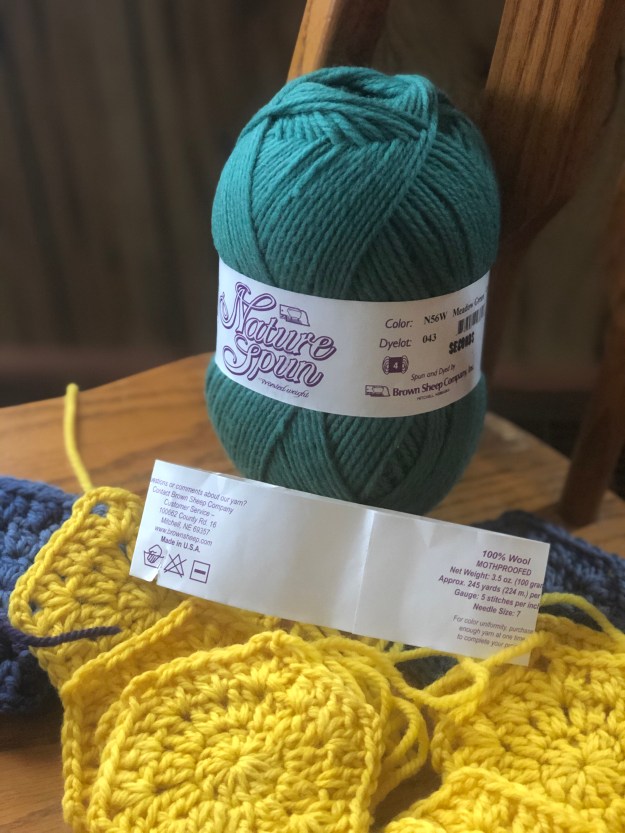
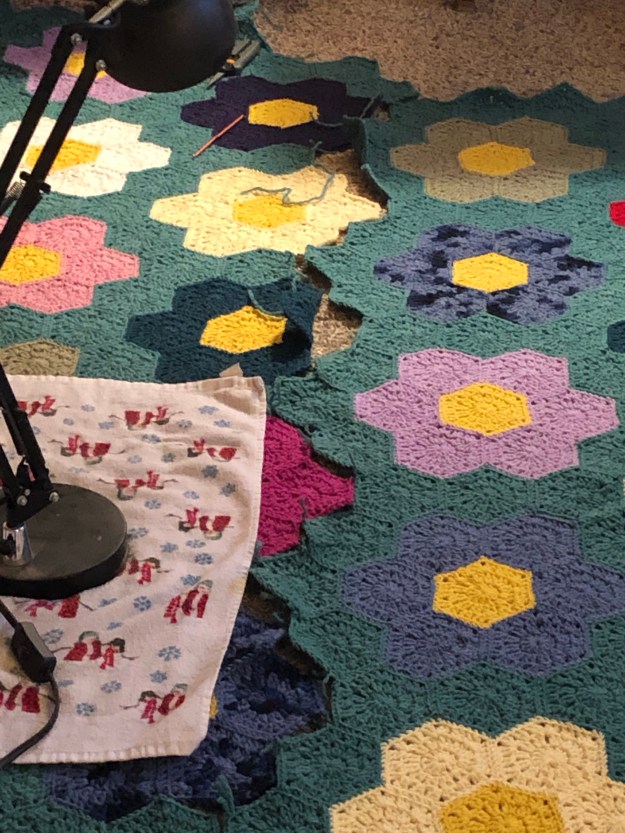
Next, I found a hexagon pattern I liked. I didn’t want something that used a ton of yarn (like the one in the original picture), or that was complicated to make. The one I settled on only had 3 rounds, and I could complete one in under 8 minutes. It was perfect.๐Ÿ‘๐Ÿผ (I used a size “F” hook.)

Click here for the link to its pattern.

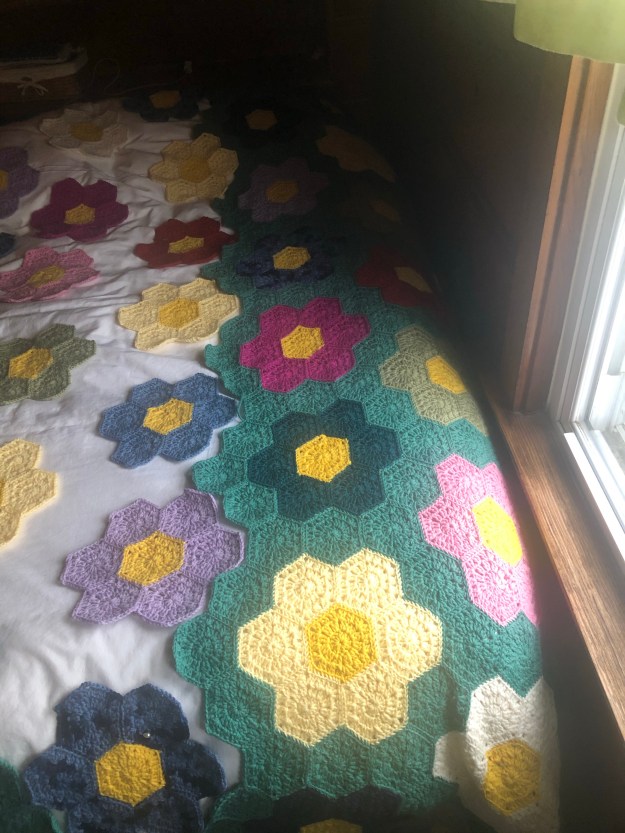
In September of 2018, it was nearing the time we’d need to make the biggest purchase – all the green. We learned of an online warehouse inventory sale that Little Knits was having for Brown Sheep Nature Spun yarn, so we investigated the price for the 30 skeins. To our amazement, each one would only be $2.65!! We did a quick inventory of how many other colors we needed to complete the remaining flowers, and placed an order for what we needed. It was so exciting to actually have all the supplies here to complete the project!โค๏ธ

It took 16 months from that point to finish those remaining flowers, all the green hexagons, and then connect everything.๐Ÿ‘๐Ÿผ

When this project started, our boys were in their junior year of high school.๐Ÿ˜ฏ I crocheted as we watched their final two years of baseball gamesโšพ๏ธ, it’s been my travel companion in the car wherever we’ve driven for the past four years๐Ÿš—, and it was in my hands during many evenings of the colder Ohio seasonsโ„๏ธ. Many prayers, tears, laughs, and even irritations have all gone with this project. I’ve learned much about my creative abilities AND its limitations, lol. Creating the hexagons and flowers was easy. Making the flowers was easy. Connecting it ALL together was NOT. Ugh.๐Ÿคฆ๐Ÿปโ€โ™€๏ธ Once the connecting got to the point of long, heavier strips of blanket, it was easy for me to get lost where I was on my pattern. Straight lines became “bendy,” and well…I often didn’t know which end was up!๐Ÿ˜ณ I’ll just say I’m very grateful the Lord gave me Mike to double check my work and help dig me out of messes.๐Ÿ˜† I became an expert on how to disconnect hexagons without ruining them.๐Ÿ™„ <For those who are not familiar with crochet – one wrong snip of the yarn and the entire hexagon could unravel.๐Ÿ˜ฌ>

I’ll end with the funniest mistake I made the day before completion. I was down to my final group of flowers to connect to unite the two sides of my blanket. <In hindsight, with my connecting-challenged abilities, I SHOULD have just worked from left to right.> Mike helped me line up the first flower, and went to bed. Some time between picking up both sides of the blankets and getting situated on my chair to crochet it, I must have moved the flower’s position to the wrong set of green hexagons. AND I NEVER DOUBLE CHECKED ANYTHING UNTIL I WAS DONE. I had decided I was going to stay up as late as it took since the end was so close… So at 12:30am, everything was connected, all my ends were tucked in, and I was ready to lay it out and admire its beauty…๐Ÿ™ˆ

Ugh. I couldn’t believe it.๐Ÿ˜ซ๐Ÿ˜‚

Needless-to-say, it was NOT finished that day.๐Ÿคช I spent Sunday afternoon, evening, and late night disconnecting the entire strip, fixing all my ends, and re-attaching to the correct location.๐Ÿ‘๐Ÿผ๐Ÿ‘๐Ÿผ๐Ÿ‘๐Ÿผ

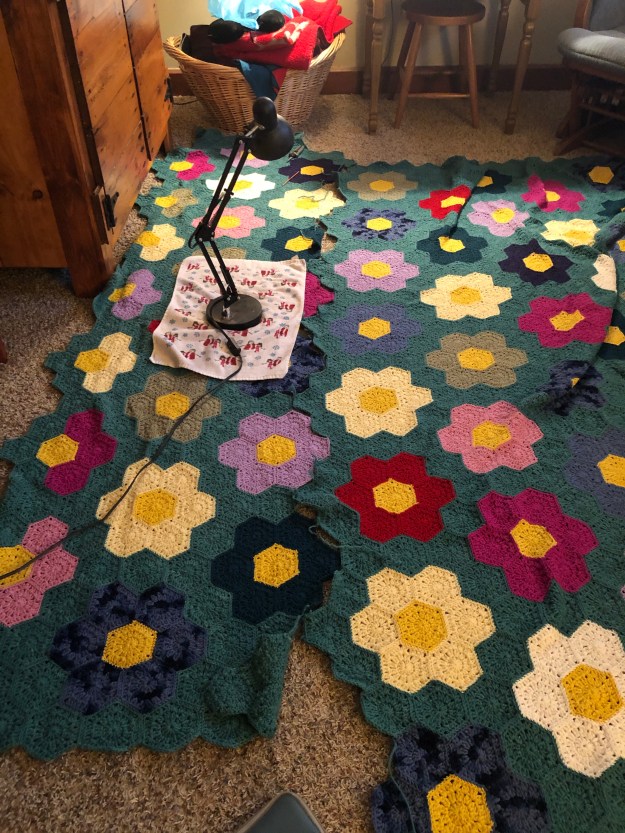
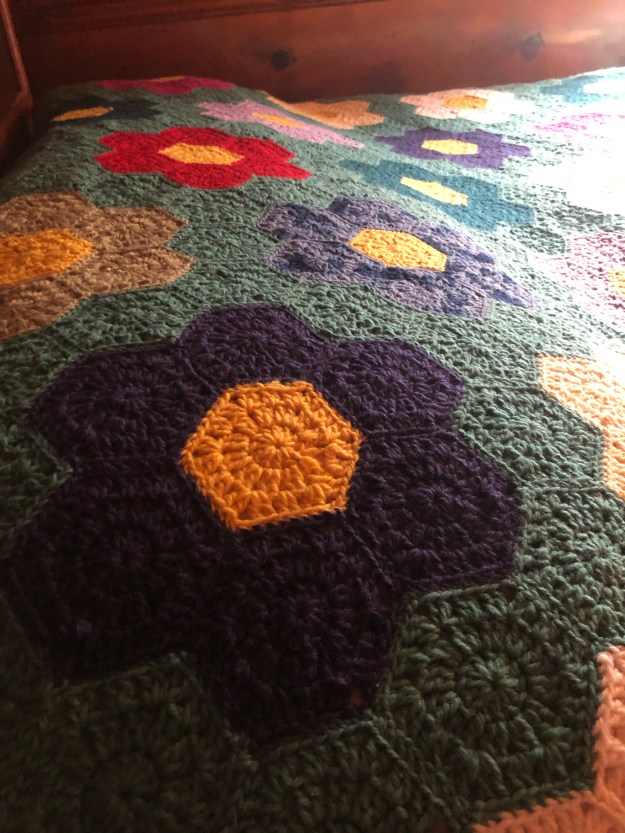
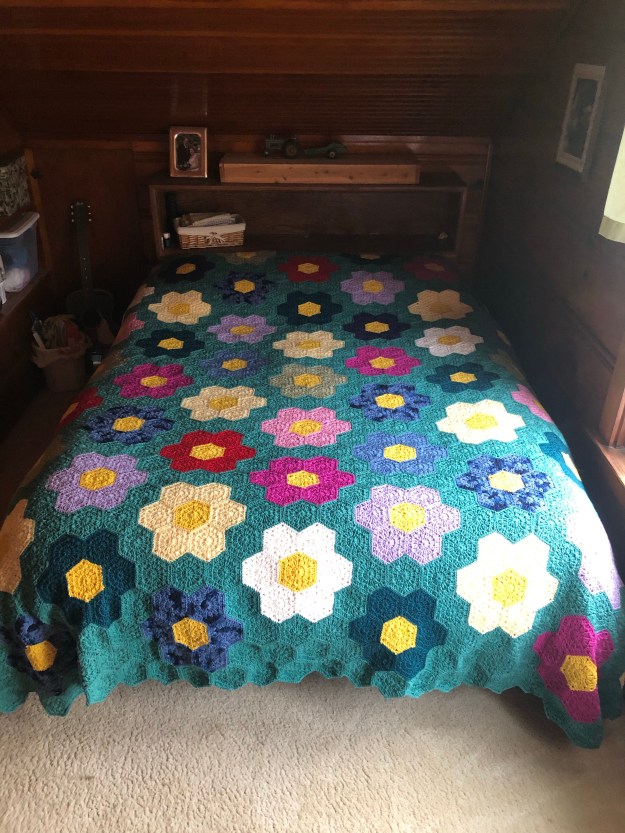
Last night was the first night we had it on our bed. LOVED IT! It was toasty warm and didn’t slide off the down comforter like other blankets have.โค๏ธ Now I’ll be on the lookout for a bed-skirt when we hit the estate sales. I think that would be a nice finishing touch.๐Ÿ˜Š

I’m excited to crochet some new projects now – but I think it will be awhile before I do another BIG one, lol.๐Ÿ˜Ž

Might as well end with my nerdy details๐Ÿ˜:

53 full flowers and 14 half flowers

Grand total of 875 hexagons.

875 x 7.75 minutes each = 113 hours in crocheting hexagons, and no idea how many hours in connecting everything…๐Ÿคท๐Ÿปโ€โ™€๏ธ๐Ÿ˜‰

Thank You, Lord, for giving me the ability to crochet. What a fun activity to keep my hands from being idle! I’ll always treasure the time that was invested in this blanket. Thank You for giving me Your Word to meditate on, personal circumstances to talk to You about in prayer, conversations I was able to have with others as I worked on it, and for the activities I was able to watch while crocheting. May the warmth of Your love be felt by each person who is wrapped up in it, for however long it lasts. Amen

Scripture pictures and frames

Over the past few years, we have played with adding Scripture to pictures we’ve taken as we “walk”.ย  Here is a post about the frames we made from our old pickets as 2014 Christmas gifts, and a link to a new page on this blog that will house the pictures. ๐Ÿ™‚

IMG_0297IMG_2810IMG_2651You’ll notice we had to change the location of the white note – not a good idea to cover up the hole where the dowel rod should go, lol! ๐Ÿ™‚

IMG_2655

Since I didn’t have enough pockets for each frame, some got envelopes instead. ๐Ÿ™‚

IMG_2659Click here for a link to the Scripture pictures page on this blog…

Snowmen from old socks

This idea was originally from a Facebook craft post that was circulating last year – snowmen made from old socks, filled with rice. It seemed like a doable idea for us, since we always have holey socks… AND I’ve been searching for a craft to use up some old dried beans that I had bought before we started growing our own a few years ago. Soooo, my snowmen are filled with dried beans, instead. Worked like a charm! ๐Ÿ™‚

Besides the rubberbands, I also tied string around them as a safety precaution. (Because at our house, rubber bands break quite often and usually at inopportune moments, lol!) ๐Ÿ™‚

By far, this was my favorite craft this Christmas! Just some tacky glue, my hot glue gun, and a plethora of miscellaneous odds and ends I keep for future projects. I’d STILL be makin’ them, but I ran out of beans, even after buying 10 more pounds of them at the Dollar Store, lol! I have a feeling I may cave and buy more beans so I can create more of these cuties during the year… ๐Ÿ™‚

20131229-190801.jpg

20131229-190829.jpg

20131229-190908.jpg

20131229-191008.jpg

20131229-191052.jpg

20131229-191728.jpg

20131229-191759.jpg

20131229-191827.jpg

20131229-191914.jpg

20131229-192010.jpg

20131229-192028.jpg

20131229-192121.jpg

20131229-192104.jpg

20131229-192141.jpg

20131229-192201.jpg

20131229-192221.jpg

20131229-192244.jpg

20140105-192139.jpg

20140105-192157.jpg

20140105-192229.jpg

20140105-192257.jpg

20140105-192348.jpg

20140105-192513.jpg

20140105-192558.jpg

Puzzle piece frames

A friend retired from teaching a couple years ago & gave us a bunch of puzzles she found when cleaning out her schoolroom. One of the larger puzzles was missing pieces, but I just couldn’t throw them away… So in a coffee can they went – just waiting to be transformed into SOMETHING… ๐Ÿ™‚

Guess this was the year! My original plan was to make ornaments, but I wasn’t happy with any of my samples. Then I became enamored with the words “peace” and “piece”, and this frame/pic is the end result. ๐Ÿ™‚

Very indicative of the journey the Lord has us on… ๐Ÿ™‚

20131229-192850.jpg

20131229-192907.jpg

Hodge podge floor lamp

Mike made me this unique floor lamp table for Christmas from scrap treasures he found. His brother was getting rid of a floor lamp with a broken base, so he salvaged it. Then he found an old rusty milk can in the barn, cleaned it up, protected it with POR-15, and gave it a fresh coat of paint. (His mom remembers the milk can from long ago, but doesn’t remember why it was fitted with the spicket on the front. Mike actually attached the lamp to the lid without damaging the can, so technically, it’s still useable…) Then he found an old silo door, cleaned it up, & varnished it. Attached it all together, & “whell-ah”, a new creation. I LOVE IT!! ๐Ÿ™‚

Still need to find a lampshade that will work on it… Not having much success at finding physical stores with longer lampshades to look at, in person. Since this lamp is higher than an average sized one, we’re thinking a shade 16-22″ would help to disguise its height. Or Mike said he could make the pole shorter, though he wasn’t too excited about doing that.

20131229-194943.jpg

20131229-195005.jpg

20131229-195028.jpg

I’m also not opposed to making our own. Found some amazing ideas on the internet – here are a couple ideas…

20131229-200220.jpg

20131229-200231.jpg

Wonder what we’ll come up with & how long it will take us, lol? I’m thinking these wire frames on etsy have a lot of potential…hmmm… ๐Ÿ™‚

Any suggestions are welcome… ๐Ÿ™‚

Personalized Cooperstown ornaments

John and Linda at the Cooperstown Bed & Breakfast sent our boys home with snacks for the 9 hour drive & some fun little gifts. I was excited about these two cross-stitched ornaments. I thought it would be fun to stitch dates on the backs as a keepsake of their trip. ๐Ÿ™‚

Downloaded a free alphabet pattern & mapped it first on graph paper. My knots had to show since the pillow was already completed, but I think it kinda adds to their charm… ๐Ÿ™‚

Now, each boy will have their own to take with them someday. LOVE gifts like that! ๐Ÿ™‚

20131229-194114.jpg

20131229-194143.jpg

20131229-194213.jpg

20131229-194234.jpg

Pillowcases from old jerseys

While Mike & the boys were in Cooperstown, I worked on this Christmas gift for the boys: making pillowcases out of their old baseball jerseys.ย  As I look back, sometimes I wish I would have saved ALL their old baseball shirts from coach-pitch, up. I’ve seen some pretty neat patchwork quilts that have been made from items like that. But truth-be-told, I never even thought about it. Most likely, they got turned into rags...

But as the boys got older, they became more sentimental about their seasons & asked me to save their shirts.ย  It’s hard for me to store away boxes of “stuff” these-days, so I’ve been brainstorming about a “function” for these jerseys that would preserve them and yet still be useful. Guess that’s how this idea came about. ๐Ÿ™‚

I know I’ve said before in my craft posts that I’m not fond of “machine sewing”. (I know, I know, what was I thinking about making a QUILT, lol…) That being said, this was a perfect project for me – mainly because it was pretty forgiving – whatever size the pillowcase turned out, it would inevitably fit at least one of our old throw pillows! (Which was actually a pretty cool revelation.ย  As I was contemplating how to make these, I had originally thought I’d need to buy pillow forms to put these pillowcases on, which would limit how many I could actually make. And as I began to get grumpy about what I figured a pillow form would cost to buy, suddenly the Lord inspired me with the thought of just covering all the old “throw pillows” we’ve collected over the years that don’t match with anything anyway! :))

When I first started making them, I thought I’d have to make measurements so a shirt would fit the pillow.ย  Super cool that wasn’t the case, because I’m challenged at calculating those kind of sewing details, lol…ย  Turned out the size of their shirts made for a pretty universal throw pillow size. ๐Ÿ™‚

I had these done in two days & wrapped and under the tree when the boys came home.ย  I wondered if they’d notice all our throw pillow were missing, but they didn’t, lol… Further proof that I take too much stock in the small details of life sometimes! ๐Ÿ™‚

IMG_7716

IMG_7719IMG_7720IMG_7721IMG_7724IMG_7725IMG_7726IMG_7728IMG_7729IMG_7764IMG_7763

Childhood “alphabet code”

Met up with a friend from my past this week on Facebook, and was reminded of the alphabet code she & I made up in our elementary school days… It has been a joy to reminisce with her and catch up! ๐Ÿ™‚

I remember creating it with her…trying to use features from each letter, but just mixing the features up. We would write short stories in a notebook, trade them, decipher them, and even graded them, I think! Yep. Began rambling a LONG time ago! ๐Ÿ™‚

I’ve often thought about our “code” over the years, and at one point tried to impress my boys with it… (Which completely UNimpressed them – in fact, it was further proof that their mom was weird um, different, lol!)

There are two letters I can’t remember: Q and Z, but I don’t think that’s too bad considering that was 30 years ago or so! ๐Ÿ™‚

Perhaps there are other creative young minds who will have fun playing with our code…? ๐Ÿ™‚

20130410-204053.jpg